Experiment time!
How long would it take you to build an app like this from scratch?

- Talks to an API to find recipes
- Shows a list of delicious pics
- Lets you click on a pic to see a recipe
Well … first you’d have to get the app itself up and running, then you gotta wire up navigation, set up Redux to keep it all connected, build the screens, style it all …

It’s more work than it looks.
So I decided to run an experiment: Can the Shoutem App Builder make this faster?
Made a Shoutem Builder account, started a timer, hit record, and clicked furiously. This article recaps how the experiment went down, but you should watch the video, it’s better
Make the base app

To start the experiment we create a new app. Turns out all it takes is to click a button and choose a default layout. I went with News because it looked like a list of pictures.
From then on, we picked what our navigation is going to look like, threw out some useless screens, and ran the app in a built-in simulator. That part is neat. Lets you run the app inside your browser so you can see what you’re doing.
My understanding is that this area is meant for your boss or your client. That person who puts on the finishing touches, adds some content, or cobbles together an app parts you pre-built for them.

But you and I, we’re coders. We want more. We’re gonna build custom extensions. Extensions are what you then put together like LEGO blocks in the Shoutem App Builder.
During the experiment I followed the official Build Your First Extension guide.
Run it locally

We first run the app locally. You need the Shoutem CLI and cocoapods for that.
$ npm install -g @shoutem/cli
$ gem install cocoapods
$ shoutem login
That installs the command line interface (cli) and logs you in. You need a Shoutem account to do this part.
Next step is to clone the app from your Shoutem account to your computer. That happens with the shoutem clone command.
$ shoutem clone
It gives you a list of your apps to choose from and downloads the one you want. Including all dependencies, setting up any linking, and generally taking care of all the things.
You run the app with react-native run-ios or react-native run-android. It’s set up for both.
Make a custom extension

We can use the Shoutem CLI to get the ball rolling on a custom extension. It sets up the basics.
$ cd extensions/
$ shoutem init recipes
This creates a directory in YourApp/extensions/yourname.recipes with app/ and server/ directories and an index.js file. Plus some meta data setup to play well with Shoutem.
But this extension can’t render anything yet. We have to add a screen.
Once more, Shoutem CLI can do that for us.
$ cd swizec.recipes/
$ shoutem screen add List --shortcut Recipes
I’m not sure what the --shortcut part does, but that’s what the screen ends up being called in the Shoutem Builder interface. The rest creates a new List.js file in YourApp/extensions/<yourname>.recipes/app/screens/.
It contains a simple Hello World screen.
Now you have to publish your extension to Shoutem, install it, then add the screen in the web interface.
$ shoutem publish
$ shoutem install
I don’t know why you have to add it on the web after you’ve run shoutem install.
But you do have to then run shoutem configure to rejig your local copy of the app so it follows the web interface.
// cd into App root
$ shoutem configure
A new screen appears.

Wonderful
Making it look like a list of photos
This part of the experiment led me down the wrong rabbit hole. Twice. Trying to copy and edit the shoutem photos extension was a bad idea.
Building it from scratch proved much easier. Here’s the whole component to render a list of one chicken soup.
export class List extends Component {
    constructor(props) {
        super(props);

        this.renderRow = this.renderRow.bind(this);
        this.state = {
            recipes: [{
                name: "Chicken Soup",
                image: {
                    url: "chicken soup pic url from google"
                }
            }]
        }
    }

    componentWillMount() {
        this.getRecipes();
    }

    getRecipes() {
        // load from API
    }

    renderRow(recipe) {
        const { name, image } = recipe;

        return (
            <Image styleName="large-banner" source={{ uri: image && image.url ? image.url : undefined  }}>
                <Tile>
                    <Title>{name}</Title>
                </Tile>
            </Image>
        );
    }

    render() {
        return (
                <ListView data={this.state.recipes}
                          renderRow={recipe => this.renderRow(recipe)} />
            );
    }
}
Component that returns a <ListView> with this.state.recipes as the source of data and a local renderRow component that renders an <Image> with a <Title>.
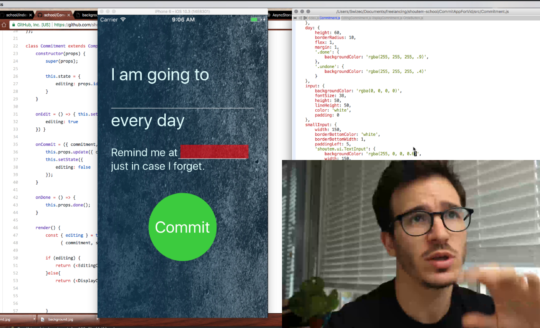
Ok, it looks a little different in the video. I forgot to commit during the experiment.
Add a details screen

This part was easy. We used Shoutem CLI to generate a new screen, then copypasta’d its design from the official guide.
// in swizec.recipes/
$ shoutem screen add Details
No --shortcut option this time because Details isn’t a main screen. It exists only to support the main List screen.
There’s nothing interesting about the component itself. Gets some props, renders a picture and some text. Whole thing looks like this:
export default class Details extends Component {
    render() {
        const { recipe } = this.props;

        return (
            <ScrollView style = {{marginTop:-70}}>
                <Image styleName="large-portrait" source={{ uri: recipe.image &&
                                                          recipe.image.url ? recipe.image.url : undefined }}>
                    <Tile>
                        <Title>{recipe.name}</Title>
                    </Tile>
                </Image>

                {recipe.ingredients.map(ingredient => (
                    <Row>
                    <Text>{ingredient}</Text>
                    </Row>
                 ))}

                <Divider styleName="line" />

            </ScrollView>
        );
    }
}
See, nothing special. We assume our recipe has an image and a list of ingredients. The API I found doesn’t give us the steps to cook something.
Because you can just guess the recipe from the ingredients list, right? Of course you can.
To support navigating to Details, we have to add some Redux support to List.
It becomes exported via a connect() call, like this:
export default connect(
  undefined,
  { navigateTo }
)(List);
And we wrap renderRow in a TouchableOpacity component with an onPress callback. Like this
 <TouchableOpacity onPress={() => navigateTo({
                screen: ext('Details'),
                props: { recipe }
            })}>
            // ...
</TouchableOpacity>
That’s all you have to do. Navigation now works.
Loading data from API
Last step is to load the list of recipes from that Edamam API I found. The “hard” part here was understanding the data shape coming from API and picking out what we need.
That part looks like this
    componentWillMount() {
        this.getRecipes();
    }

    getRecipes() {
        fetch(`https://api.edamam.com/search?q=chicken&app_id=${APP_ID}&app_key=${APP_KEY}&diet=balanced`)
          .then(res => res.json())
          .then(json => {
              this.setState({
                  recipes: json.hits.map(({ recipe }) => ({
                      image: { url: recipe.image },
                      name: recipe.label,
                      ingredients: recipe.ingredientLines
                  }))
              });
          })
          .catch(err => console.error(err));
    }
Fetch data from API, pluck out the image, name, and list of ingredients. Save to state, let React re-render.
And our Recipe App works. It’s not very useful, but it sure looks good.
You can see the full code on Github.
Happy hacking you never have to code the boring parts again.
PS: To make the `Recipes` extension proper useful, we’d have to add configuration to Shoutem Builder so our boss/client/lazyfutureself could add new screens and configure what kind of recipes they show.